
Module 3: Air tightness and the use of tapes
Modules
1. Comfort, sound insulation and resilience ![]()
2. Overheating ![]()
3. Air tightness and the use of tapes
4. Use of vapour control membranes
Need Materials?
If you’re working on a building project and need help specifying your materials, checkout the following.
Overview
Airtightness is a relatively new concept to many and so in this section we’ll go through the best types of tapes to use for airtightness and weather tightness and also how to ensure a building can be made airtight.
Airtightness, as a principle, allows the occupants of a building to control the amount of ventilation they need at any given time, irrespective of what the external weather conditions may be. This ensures that the correct level of ventilation within a building can be maintained and is independent of the weather.
Making buildings airtight is the key to ensuring the highest levels of comfort and health and the lowest heating requirements. Without good airtightness insulation has a limited ability to keep a building warm and so it is essential that it is at the forefront of the design.
Airtightness itself is sometimes associated with poor indoor air quality, stuffiness and damp but these issues are caused by inadequate ventilation and not from having an airtight building. Having low levels of airtightness, sometimes called 'natural ventilation', ensures that you have uncontrolled ventilation during windy weather and no ventilation when the air is still and is not a ventilation strategy that should ever be employed.
It is important that in addition to good airtightness you ensure good ventilation, through the use of a ventilation system, to ensure good indoor air quality. This doesn’t have to be a mechanical ventilation with heat recovery system (MVHR), although they are probably the best, but it must supply adequate air flow to or from all rooms to ensure good indoor air quality.
Airtightness design
‘You should be able to place a pencil on the line of the airtightness layer and follow it around the entire inside of the building surface, floor, walls and roof, without lifting it off the page’.
The design of the airtightness element of the building should be simple so that the airtightness layer can be easily identified and can follow the interior of the building without interruption. This may involve building membranes into prefabricated structural panels, dividing structural walls into smaller sections to allow the passage of an air tightness layer or even (re) designing sections of a building in a particular way as to allow the air tightness layer to be easily installed.
In the design stage of a project it is very useful to ask the architect to draw sections through the most awkward areas of the building to highlight any issues that may arise. The most complicated areas tend to be where you change the number of storey’s of a building (e.g single to double), clere storey walls, cantilevered floors and changing from flat to vaulted ceilings. All junctions where you have more than two elements meeting, such as two walls and a floor, require extra attention and the ability to envisage details in 3D!
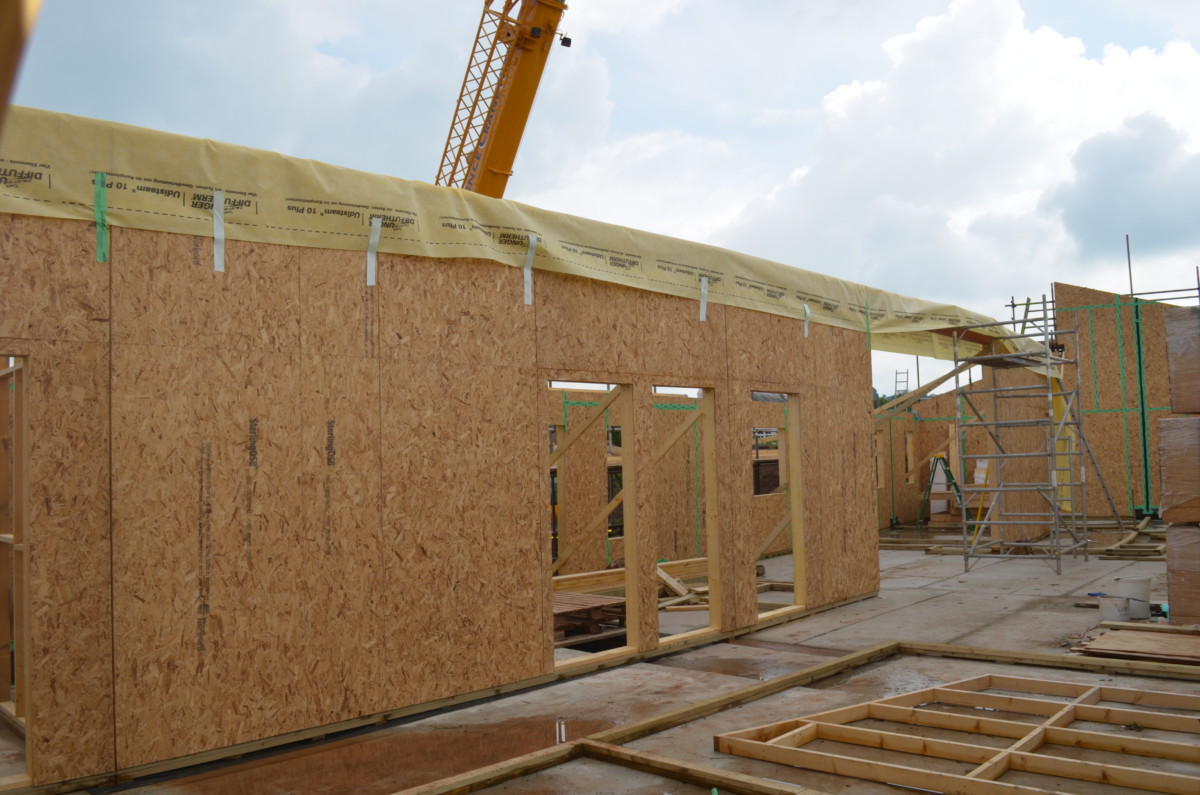
If possible, design the structure of the building in such a way that it can stand up without any internal walls/partitions so that all the necessary air tightness detailing can be completed before sole plates and internal walls are installed that will prevent access to areas of the air tightness layer. This can be done on a floor by floor basis but it is much easier to make the external shell of the building airtight without all the internal walls in the way. Alternatively, ensure strips of airtightness membrane are installed between partition wall panels and external walls/floors so that this can be connected to the main airtight layer at a later point, as in the image above.
Ground Floors
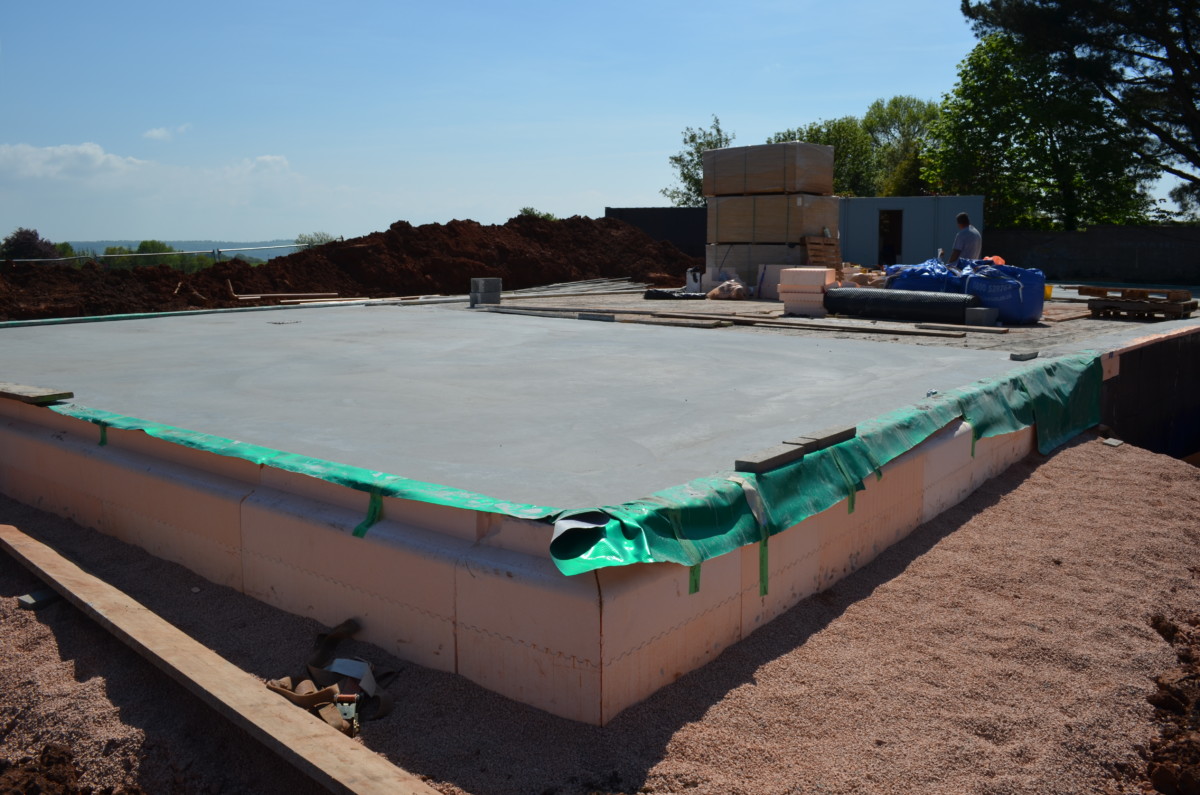
The simplest ground floor construction to make airtight is the concrete raft. This usually provides a continuous surface under the entire footprint of the building and simply requires the taping of wall airtightness layers down to the floor.
The next simplest is the timber suspended floor which, assuming any membrane can pass uninterrupted under any internal partitions, has a continuous VCL membrane over the top of the joists which can easily be connected to the airtightness layer in the walls.
Finally, solid floors and beam and block floors would be the more complex, although with the right design this need not be the case. The DPM membrane is generally too thick and cumbersome to be used as an airtightness layer and the concrete slab is too far below the rest of the structure to be accessible. Therefore, once the insulation is installed it is worth installing and airtightness membrane over the top of this prior to any screed.
Typically, all of the internal partition walls sit on their foundation blockwork which has a DPC running over the top of it. If all of the joints in the DPC are well taped, the DPC is taped to the external wall prior to the rest of the partition being constructed and the DPC overhangs the blockwork by 50mm or so all the way around (including doorways) then you can achieve good airtightness. This allows the connection with the membrane over the insulation to be made easily, prior to laying the floor screed.
First floor structures
Typically, in timber frame construction, the first floor (and above) cassettes sit on top of the ground floor panels. This is a simple detail to make airtight. A sheet of membrane is laid (with all the joints taped) over the top of the ground floor panels once erected and loosely held in place with staples or double sided tape. The first floor panels are then installed and fixed in place and the overlap of the membrane is folded back over on to the top of the floor cassettes so that the first floor panels can be installed. If the membrane is not wide enough to wrap around the floor cassette, two separate pieces can be used and joined with tape.
For timber floor structures in masonry each individual timber needs to be well mortared around and then should be taped to the masonry surface prior to plastering. The tape is important as both the timber and the plaster will shrink leaving a gap around the timber which will result in air leakage.
Walls
With masonry buildings, a large part of the airtightness layer in the walls is the plaster layer so it is important to ensure that any internal masonry walls have an airtight connection with the external walls and also the floor and roof structures are well sealed against the external walls and plaster layer.
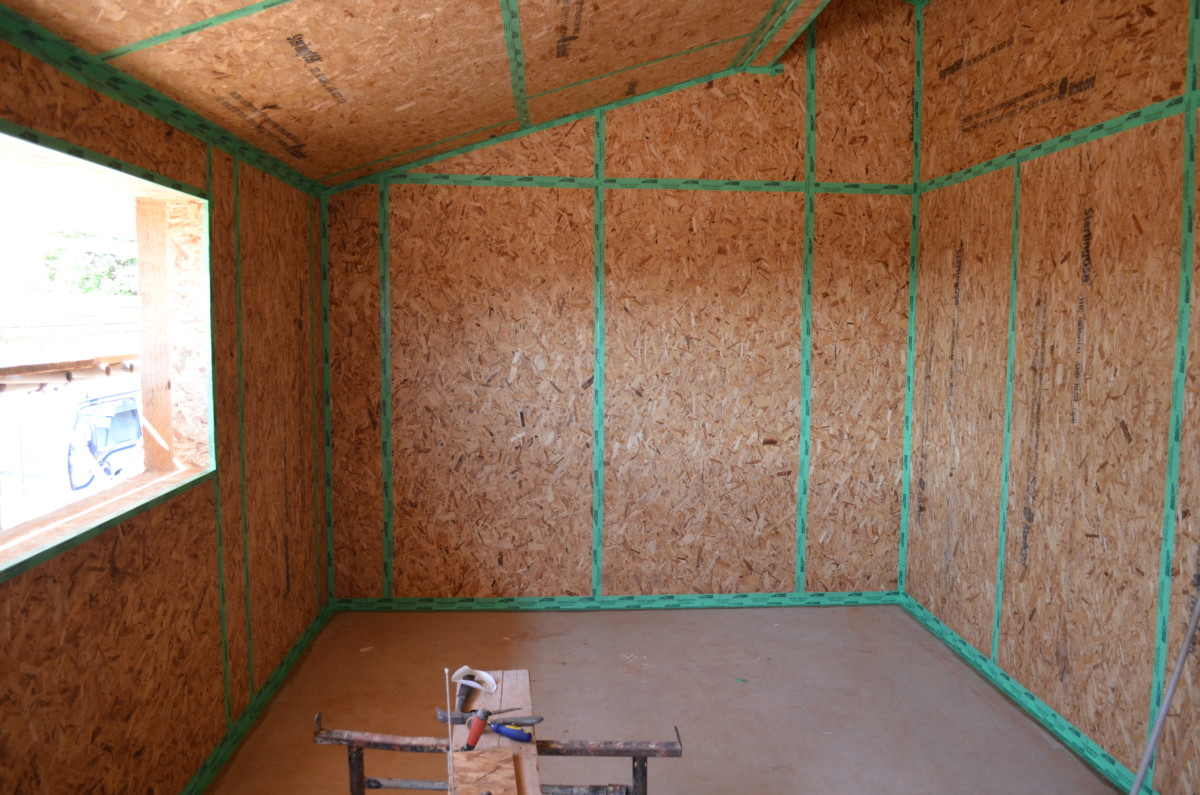
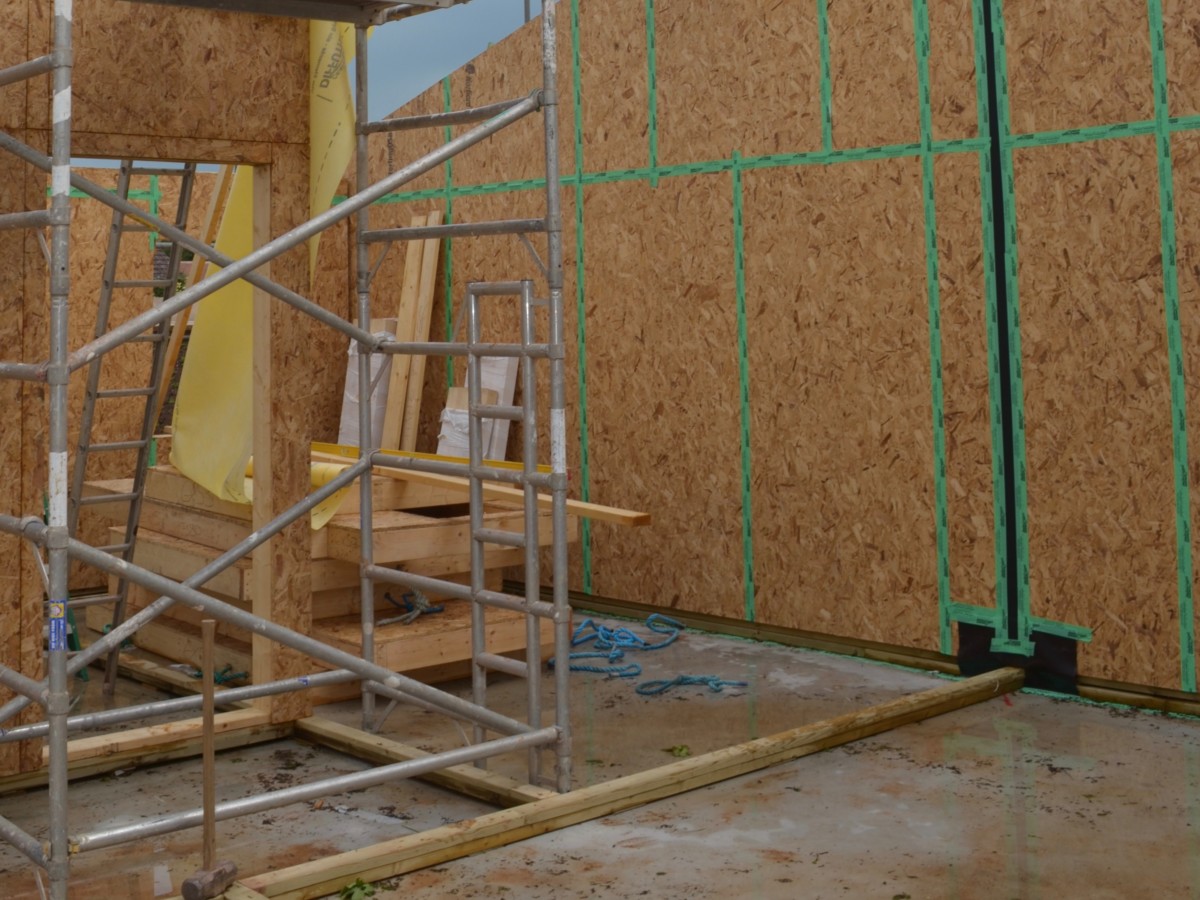
With timber frame buildings conventional membranes or boards such as Smartply Propassiv or Unilin Durelis can be used to create an airtightness and vapour control layer. All the joints between the boards must be taped which is a fairly simple process but obviously consumes a lot of tape but this does make a very robust airtightness layer. However, these boards cannot be used to replace variable VCL membranes, such as on the underside of un-vented flat roofs.
The important areas to address early on are the areas behind internal walls and connections with the floor below and ceiling/roof above.
Generally a piece of membrane is stapled to the external wall where internal partitions will eventually be sited. Any joints must be taped and connections made above with any ceiling or joist platform membranes and below with the floor membrane and/or DPC’s running over blockwork. It is important that this is done prior to the walls and sole plates being installed so that all air leakage points can be sealed. Once the internal wall is in position there are a lot of junctions that cannot be reached.
Roofs
Roofs tend to be another complicated area of the building with respect to airtightness so it is important to design the roof with this in mind.
The vapour control layer (VCL) or airtightness layer should follow the line of the insulation and not have any gaps between the two as this results in higher heat loss than calculated. Therefore, the VCL will typically follow the bottom of the flat ceiling if using trussed rafters and a cold roof design or the underside of the rafters if you’re using a pitched cut roof. Ensure that if there are any purlins or ridge beams that a piece of membrane is laid over the top before the installation of rafters to allow the air tightness layer to continue uninterrupted.
Attic trusses are very difficult to make airtight unless the airtightness layer can sit on the outside of them with all of the insulation on the outside of that (which is rather a poor use of space). Generally, attic trusses or trussed rafters should only be used if the airtightness layer is going to be installed along the bottom of them to create a flat ceiling.
Window and door openings
Window frames should always be taped back to the masonry or timber frame reveal in which they are installed. In masonry a fleece covered plasterable tape, such as Ampacoll Fenax tape, should be used to ensure that plaster can be properly finished around the window. In timber frame reveals a flexible acrylate tape is usually used and all joints in the reveal must be taped as well as the window connection itself.

Tapes
There are many different types of tape available and usually at least one for any given scenario that you might encounter. However, here are a few general guidelines for the different tapes.
- Tapes with acrylate adhesives, Ampacoll INT or Ampacoll Flexx, are generally for internal or external use on membranes, smooth timber surfaces such as ply, OSB, CLT or LVL. They are thin tapes so not generally used on rougher surfaces such as wood fibre or masonry, however the thin profile tends to allow them to be quite elastic so will accommodate shrinkage well. Some acrylate tapes, such as Ampacoll Fenax tapes, are designed to bond directly to clean, dry wood fibre insulation boards without any primer and because of their UV stability, can be used on external applications.
- Butyl tapes, such as UdiSTEAM Alubutyl tape, are suitable for use in areas where the moisture levels will potentially be high and also the chance of having sunlight on them is high. The aluminium foil face ensures that the tape does not suffer from UV degradation.
- Butyl tapes or rolls, such as Ampacoll BK535 tape, should be used to tape on to masonry or where moisture levels will be high. Butyl tapes tend to be up to 2mm thick and so can cope with rough surfaces (with the aid of a primer) more effectively and are not affected by moisture. Generally when taping down VCLs or DPCs to concrete floors these are the best tapes to use. They are also fantastically flexible and so ideal for taping around pipes and other penetrations.
- Fleece tapes, such as Ampacoll Fenax tapes, are the best types of tape to seal around window/door frames and joist ends in masonry. The thick adhesive layer adhesive ensures effective contact with the masonry and the fleece covering allows a plaster to adhere to the surface.
Each individual manufacturer will have a specification for each scenario which should be followed but following the above will help you get the best type of tape for each location.
Applying tapes
Generally, all surfaces must be clean and dry and suitable to receive a tape. That caveat means that if the surface is loose or friable it must be stabilised with something, usually a system primer, such as Ampacoll Primax. The primers ensure that the surface is bound together but also that there is a stickiness to the surface which holds the tape very well. All masonry surfaces, weathered wood fibre boards and historic surfaces (old timber or plaster) should be primed prior to applying tapes.
The least amount of taping should be done prior to the roof being constructed and the building becoming weather tight. This is mainly because tapes do not stick to wet materials and the wet structure will shrink once it dries, possibly creating holes that air can leak through. Also, acrylate tapes slowly release if they become saturated, therefore taped areas should be protected from the worst of the weather until the building is watertight.
The simplest connections, such as flat joints in boards or membranes, simply require careful application of the tape by hand and then a firm pressure, either by hand or a small roller. The tape should be left on the roll whilst applying with the release paper on the back peeled off as the roll is unwound. Once you reach the end of the joint being taped the tape can be cut to the correct length. This way the tape is kept clean and wind will not cause the tape to twist and stick to itself or anything it shouldn’t.
Internal corners, where two elements meet at and angle are a little more tricky and it is often easier to use a tape where the release paper has been split into 2 or more separate pieces, such as the Ampacoll XT double slit. A section of tape should be cut to the required length, placed in the correct location and then one of the sections of paper slowly peeled away. This allows the tape to stick to one side of the corner first which makes it much easier to ensure it is in the correct location.
Tapes with split backings are more expensive but not always necessary. With some care and a very sharp, new blade on a craft knife, you can simply score down the back of a piece of standard tape. The release papers tend to cut fairly easily and if you don’t have huge amounts to do this can help you achieve the same result, albeit rather more slowly.
External corners are much simpler and generally do not require a split backing. They can be applied in the same way as flat junctions above.
Internal corners where three elements meet, such as two walls and a floor or the corner of a window reveal are fairly simple to seal and usually best done first before the rest of the tapes are applied. Simply cut a piece of tape, twice as long as it is wide (so 120mm for a 60mm tape) and create a crease down the centre of it by folding it in half. Cut halfway across this crease, peel away the backing paper and fold into a 3d corner as in the video clip below.
https://woodfibreinsulation.co.uk/wp-content/uploads/2017/01/IMG_5757-2.m4v
For detailed guidance on installing airtightness tapes around window and door frames, please download the Window Installation Guide from Ampack, here.
![]() Ampack Window Installation guide
Ampack Window Installation guide
